Program
The clean audience picture. TAKE changes every screen routed to Program.
Broadcast / Operator guide
 to on air.
A practical run-through for the person at the controls: media, screens, Preview, Program and sound.
Five minutes to air
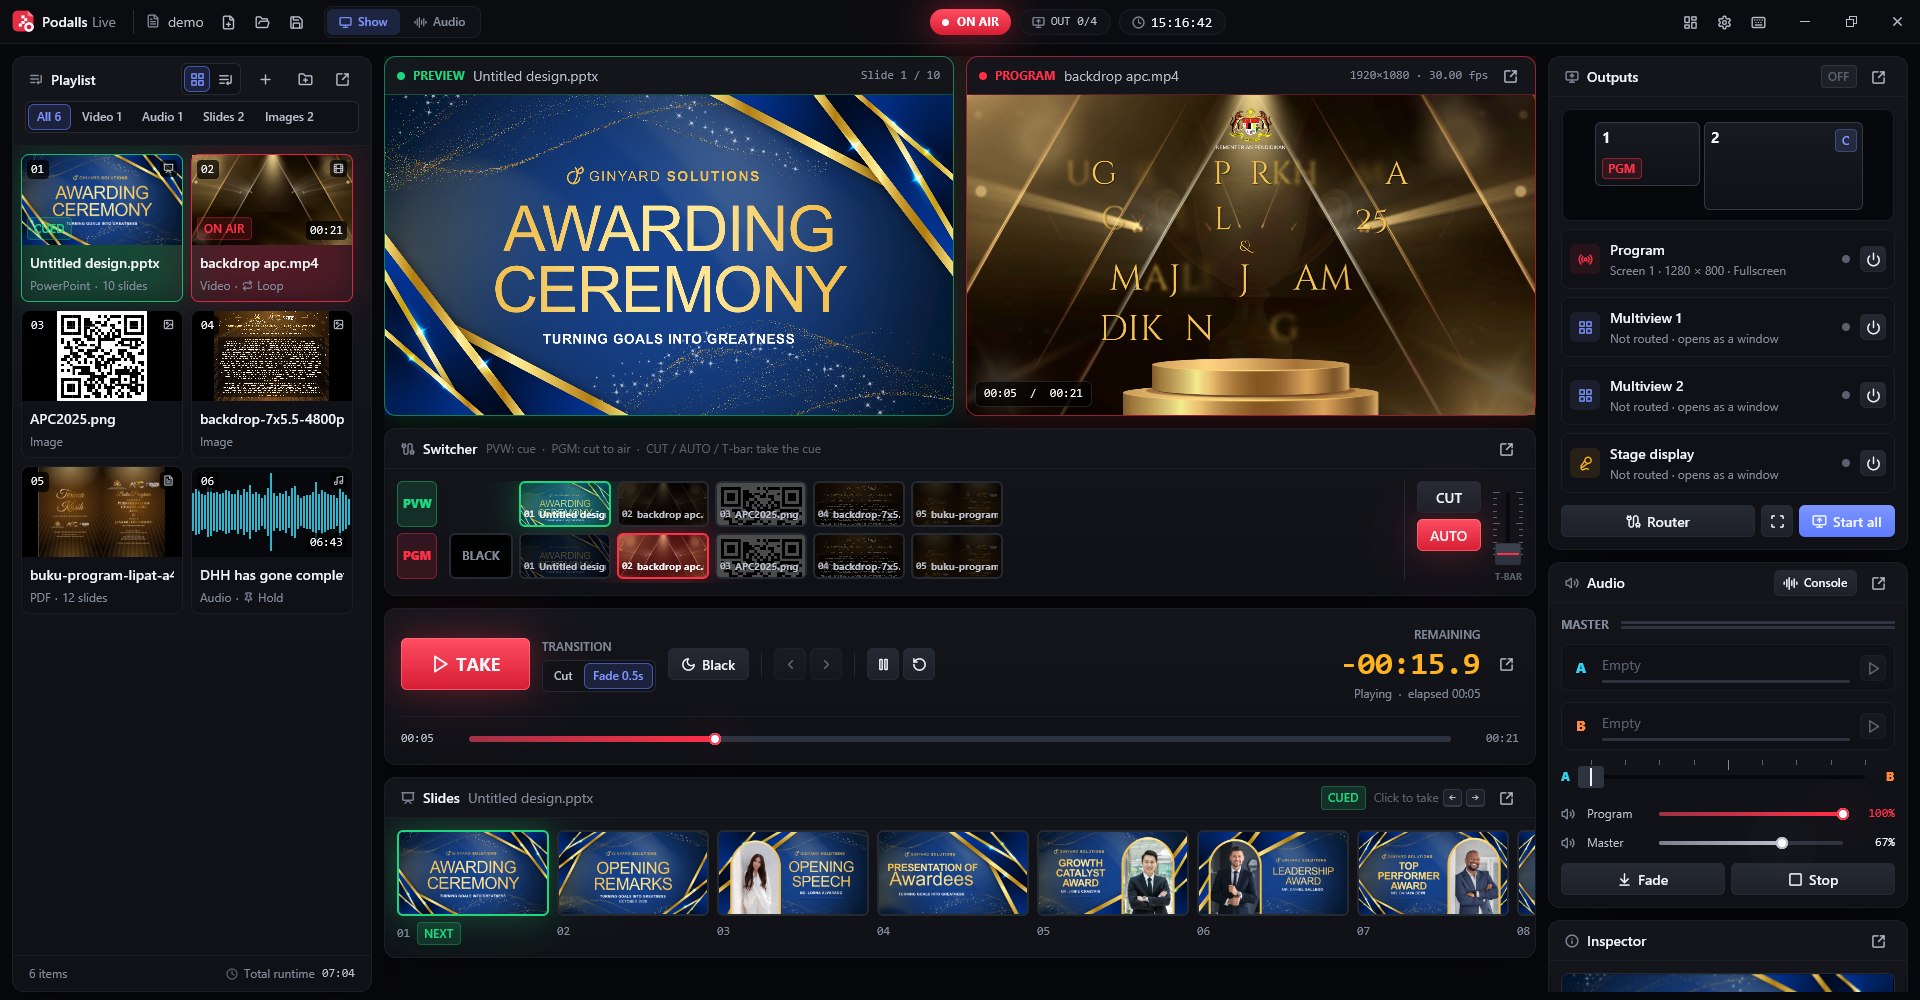
Preview is the next cue. Program is what the audience sees. Keep them separate until you are ready to take.
Drag files from Explorer onto the playlist, or press Ctrl+I. Slides, PDFs, video, images and audio can share one show.
Open Router from the OUT pill or Outputs panel. In the Program row, select the square under the projector or TV and choose Full.
Select Start on that row, Start all, or press O. The audience screen stays black until you take an item.
Select a playlist card or its PVW switcher button. It appears in the green Preview monitor without changing Program.
Press Enter, TAKE or AUTO. The item moves to the red Program monitor and every screen following Program.
Screens
Use Windows Win+P → Extend so each audience display is detected separately. Then use Identify screens in Podalls Broadcast and route each output to the right display.
The clean audience picture. TAKE changes every screen routed to Program.
The next item, visible to the crew before it goes live.
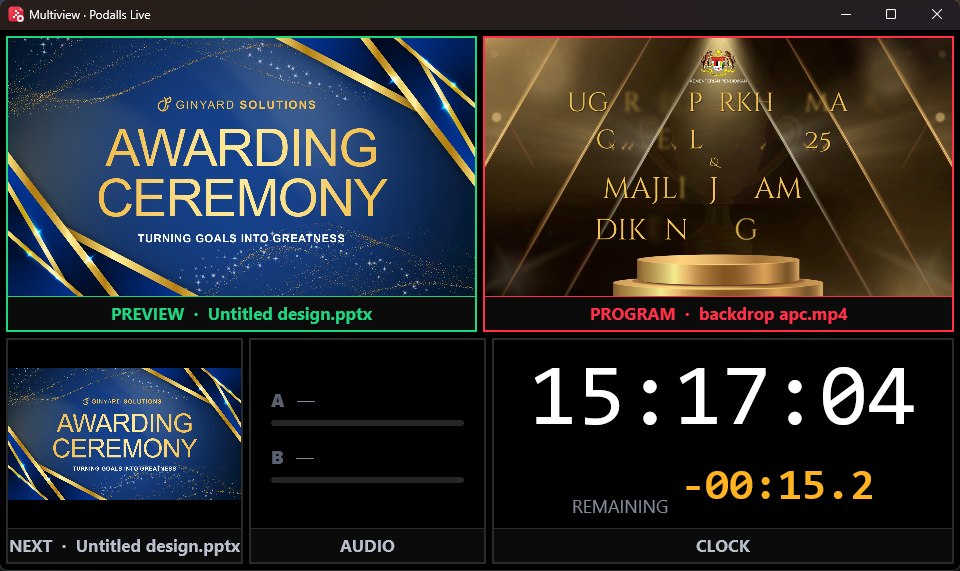
Preview, Program and production status together for an operator monitor.
Now, next, clock and countdown for presenters.
A screen can hold an independent PDF or image while Program changes elsewhere. Black this screen covers only that display, without clearing its file or stopping audio.
Media library
Add files or slide folders to the playlist. Each visual item becomes a source in the switcher; audio items play on the decks.
| Kind | Supported files |
|---|---|
| Slides | PPTX, PPT, PPSX, PPTM, POTX, ODP, PDF and slide image folders |
| Video | MP4, MOV, M4V, WMV, AVI, MKV, MPG, TS and 3GP |
| Audio | MP3, WAV, FLAC, OGG, M4A/AAC and AIFF |
| Images | PNG, JPG, GIF, WebP and BMP |
PowerPoint decks are converted to slides when first added and cached for the next opening. Animations, transitions and embedded video become still slides. A video's sound uses the Program audio channel.
Sound
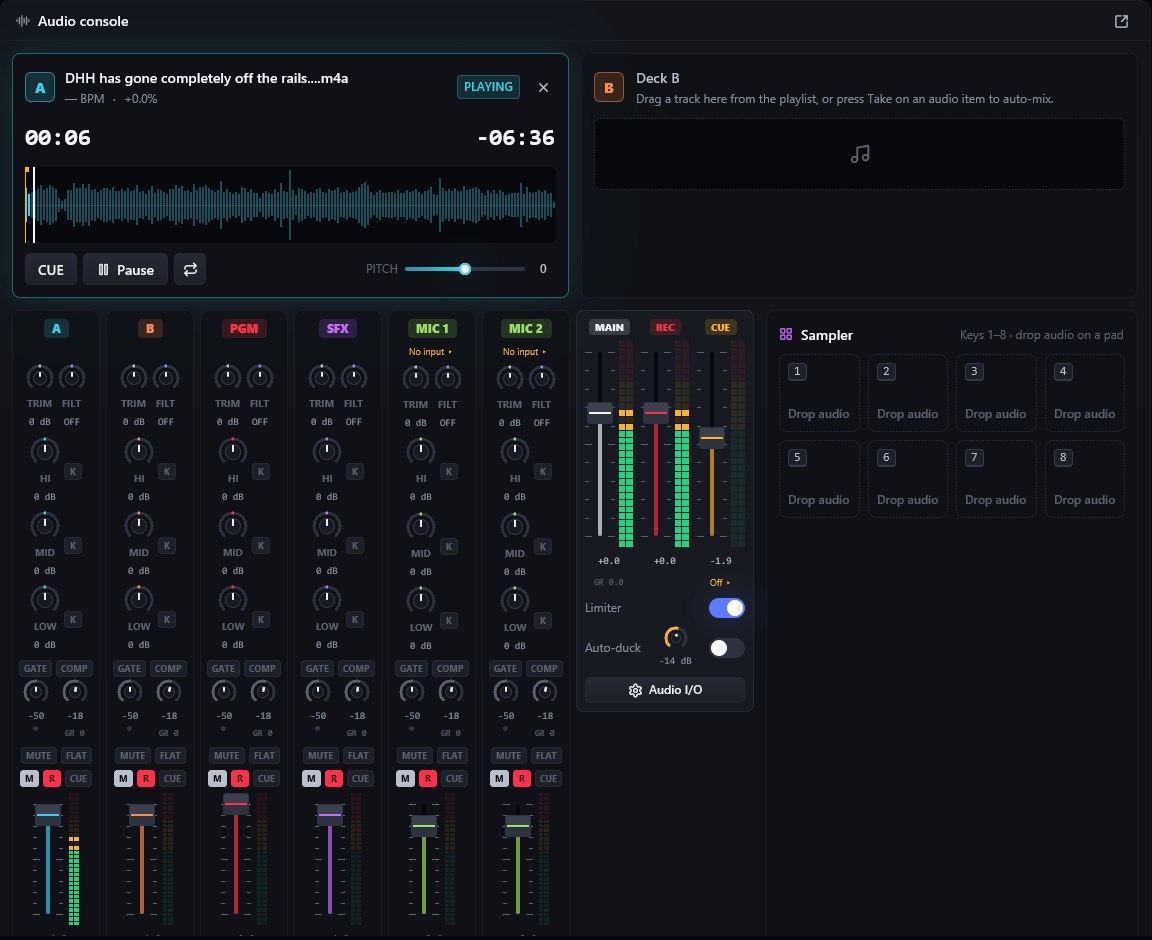
Open Audio in the title bar, or press Ctrl+2. Return to Show with Ctrl+1.
Deck A and B play tracks. The six channels cover both decks, Program video sound, the sampler and two microphones. Select devices in Audio I/O, then check channel and MAIN faders before the audience arrives.
Audio also has a headphone cue bus, an eight-pad sampler and automatic mixing between decks. Test the actual room output and headphone device before going live.
Vision
Vision has a six-camera wall, with more cameras on additional pages. Cue a feed in Preview, then switch with CUT or AUTO.
Use USB cameras or HDMI/SDI capture cards connected to Windows. Check the real hardware, USB bandwidth and GPU before a multi-camera event.
Use NDI sources when the NDI runtime is installed, or RTSP/HTTP cameras. NDI currently carries video only in Live.
In Add camera, scan the QR code from an iPhone or Android browser on the same Wi-Fi. No app store installation is needed.
Load demo cameras to practice switching without camera hardware. Remove the demo sources from Media before the real show.
Instant replay holds a temporary rolling buffer from one camera. It is not a full-show recording: clips are held in memory and clear when you open another show or close the app.
Graphics
Open Graphics for a 16:9 scene. Start from a template or blank canvas, then add text, logos, source frames and colour panels.
Arrange layers, set their motion and preview the result. TAKE GRAPHICS publishes a snapshot to Program and audience outputs; later edits stay off air until you publish again.
Use Clear design to return to normal Program playout. Designs and asset references save with the show, so keep linked images and files with your show folder when moving it.
The audience sees the last published design while you work on the next change.
Show files
Save a show with Ctrl+S. Podalls Broadcast uses .podshow files with relative media paths, and keeps a session autosave for crash recovery.
Keep the .podshow file and its media together when moving the production to another PC.
Your settings and session autosave live under %APPDATA%\Podalls Broadcast.
Converted slides are cached under %LOCALAPPDATA%\Podalls Broadcast\cache\slides and can be cleared in Settings.
If something fails, open the log folder from Settings and note the time of the problem.
Keyboard
Playout keys pause while a dialog is open, so Enter cannot take a cue by accident. Press F1 inside the app for the full list.
| Key | Action |
|---|---|
| Enter | Take Preview to Program |
| B or . | Go to black |
| O | Start or stop all outputs |
| ← / → | Previous or next slide |
| Space | Play or pause video or audio |
| Ctrl+I | Add media |
| Ctrl+1 / Ctrl+2 | Show / Audio workspace |
| F1 | See all shortcuts in the app |
Keep going
Check routing, audio and the first cue on the actual equipment before the event starts.